How to use Kunai
This guide will explain most features of Kunai, and how you can use it to edit CSD Project files and make custom UIs as well.
Explanation of CSD files
CSD files are complex, but they are made of 5 primary types, which are: Scene Nodes (they'll be referred to as Nodes from now on), Scenes, Casts, Animations and Crops. Nodes are like sub-folders for the file, they contain collections of Scenes and they can contain sub-nodes. Scenes on the other hand contain Casts and Animations.
Casts
Casts are the actual UI elements that the games displays to the player, and they can be of 3 types:
- Null (or No Draw)
- Sprite
- Font
Null Casts are casts that have no visual information attached to them, and because of that they are fully transparent, these are used primarily as ways to move, scale or tint collections of other casts.
Sprite Casts are casts that can display a Crop, which is Sega's term for a cropped sprite, these can contain multiple crops at once that can be switched through by animations or from code, which are called Patterns. Most files can only contain 32 patterns per cast, but games like Sonic Colors Ultimate can hold up to 256.
Font Casts are casts that can display multiple crops at once in the form of a makeshift font, they can hold onto text, and the individual characters can be spaced out (Kunai cannot edit these at the moment, but there will be a window to edit them soon).
All Casts share some key properties, they can be hidden, toggled on or off, they can be tinted from the 4 corners of a cast as well as tinted in its entirety, they can be moved, scaled, rotated, they can be animated, and they can inherit values from parent casts through the use of the inheritance flags.
Animations
Animations are used by the game to manipulate the scene's Casts, each animation in a scene can edit any casts inside of it, and they can manipulate some of the casts' values, such as:
- Visibility
- Horizontal Position
- Vertical Position
- Rotation
- Horizontal Scale
- Vertical Scale
- Color
- Vertex Colors (casts can be tinted on all 4 corners in addition to tinting it all)
- Pattern
How to use the interface
Kunai is made up of 4 main windows with some extra windows that can be used by enabling them through the View menu ( View > Windows ).
Hierarchy
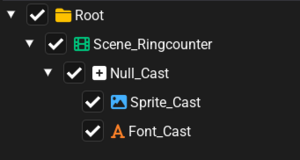
The Hierarchy displays the contents of the currently loaded file, Nodes will have a folder icon, Scenes will have a film icon, and Casts will have different icons based on their type. Note that the checkboxes on the left side of all these controls only change the visibility in the program, not in the file itself.
Inspector
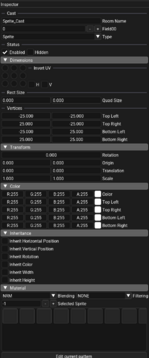
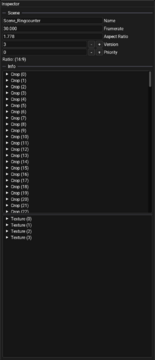
The Inspector window allows you to modify the values of Scenes and Casts, the properties of the casts may change depending on the type (e.g. a Sprite cast will not have a Text section, a Null cast wont have a material section). Scenes contain the framerate and the target aspect ratio of the scene.
-
Casts inspector
-
Scenes inspector
Viewport
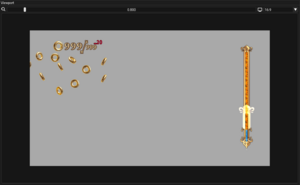
The Viewport window displays what the entire CSD Project file is rendering at that time, you can zoom in and out of it and you can change it's aspect ratio from 16:9 to 4:3, as some older files are made for use with 4:3 only and don't stretch. If a Cast is on-screen, you can edit it by clicking on it in the viewport window.
Animator
The Animator window lets you modify the selected scene's animations, these can also be turned on or off (just like for the Hierarchy window, this only changes the visibility in the program). This window also allows you to view the 4 corners of every cast currently displayed, which can be useful to see where a cast is if it is off-screen, and it allows you to take a screenshot of the current state of the viewport window (although, due to an issue with the renderer, it'll always save the background too but it'll be fixed in the future).

Other windows
Kunai will have other tools available as windows in the future, an example of a tool window is the Crop Editor window, which allows you to edit the crops in a file.
Actions
In this section, some basic actions that can be done will be explained.
Register File Extensions
If you click on ( Edit > Associate file extensions ), a program will open to register xncp, yncp, gncp and sncp as filetypes for Kunai, and will give them distinct icons.
Changing a Sprite Cast's patterns
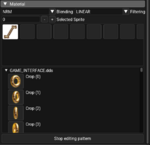
To change the patterns used by a cast, you have to open it in the Inspector, go to the Material section, change the Selected Sprite field to the pattern index you want, and then click on "Edit current pattern", this will enable a list view that lets you change the current pattern in that slot. Once you've selected the crop you want, you can click on "Stop editing pattern" to close the menu.
Adding new Scenes and Casts and removing them

While creating new Scenes and Casts is supported, it is quite buggy and isn't guaranteed to work in all games. To add new Scenes, you have to right click on a Node, and select the "New Scene" option. To add a new cast, right click on a Scene or another Cast, and open the "New Cast..." menu, from there you can make a cast of any of the 3 types. You can delete Scenes and Casts by right clicking on them, and pressing "Delete".
